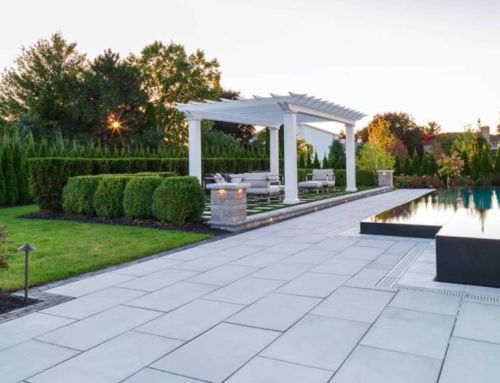
A techo bloc semma wall installation looks straightforward on paper, but long-term performance depends on the details most guides gloss over. Semma is a versatile, double-sided wall system used for retaining walls, seating walls, and freestanding garden features. When it is installed correctly, it delivers clean lines, structural stability, and years of durability. When it is not, issues like leaning, bulging, or drainage failure can appear within a single season.
This guide is written to bridge the gap between manufacturer diagrams and real-world installation. Drawing from field experience and material guidance you would expect from Old Station Outdoor & Landscape Supply, it translates technical specs into a clear, build-ready process that contractors and experienced DIY homeowners can follow with confidence.
What Is a Techo-Bloc Semma Wall System?
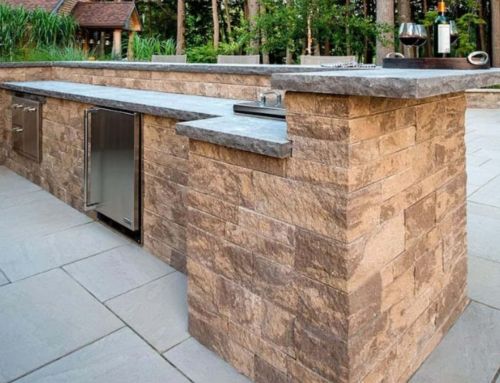
The Semma wall system from Techo‑Bloc is a modular concrete block design that works as both a retaining wall and a freestanding wall. Each block is manufactured with tight tolerances. This allows consistent alignment and a clean architectural look once installed.
Unlike single-faced retaining wall blocks, Semma units are finished on both sides. This makes them ideal for applications where both faces remain visible, such as raised patios, garden dividers, or seating walls. The same system can also be engineered as a structural retaining wall when height or soil conditions require reinforcement. From an installation standpoint, Semma walls fall into two categories: gravity walls and reinforced walls. Understanding which category applies to your project is the first critical decision.
Gravity Wall vs Reinforced Wall: How to Choose
Choosing between a gravity wall and a reinforced wall is not a design preference. It is a structural decision based on height, soil conditions, and what sits behind the wall.
When a Semma Gravity Wall Is Appropriate
A gravity wall relies on the mass of the blocks and proper base preparation to resist soil pressure. Semma gravity walls are typically used for low retaining walls or freestanding applications where loads are minimal.
Gravity walls are appropriate when wall heights are limited, the grade behind the wall is level, and there are no additional surcharges such as driveways, slopes, or structures. In these situations, proper embedment, drainage, and compaction provide enough resistance without reinforcement.
When a Reinforced Semma Wall Is Required
Once wall height increases or site conditions become more complex, reinforcement is no longer optional. Reinforced Semma walls use geogrid layers extending into the backfill to distribute loads and improve stability.
Reinforcement becomes necessary when walls retain taller soil masses, support sloped grades, or sit near heavy loads. In these cases, geogrid placement, spacing, and embedment depth must follow engineering guidelines. Skipping reinforcement where required is one of the most common causes of wall failure.
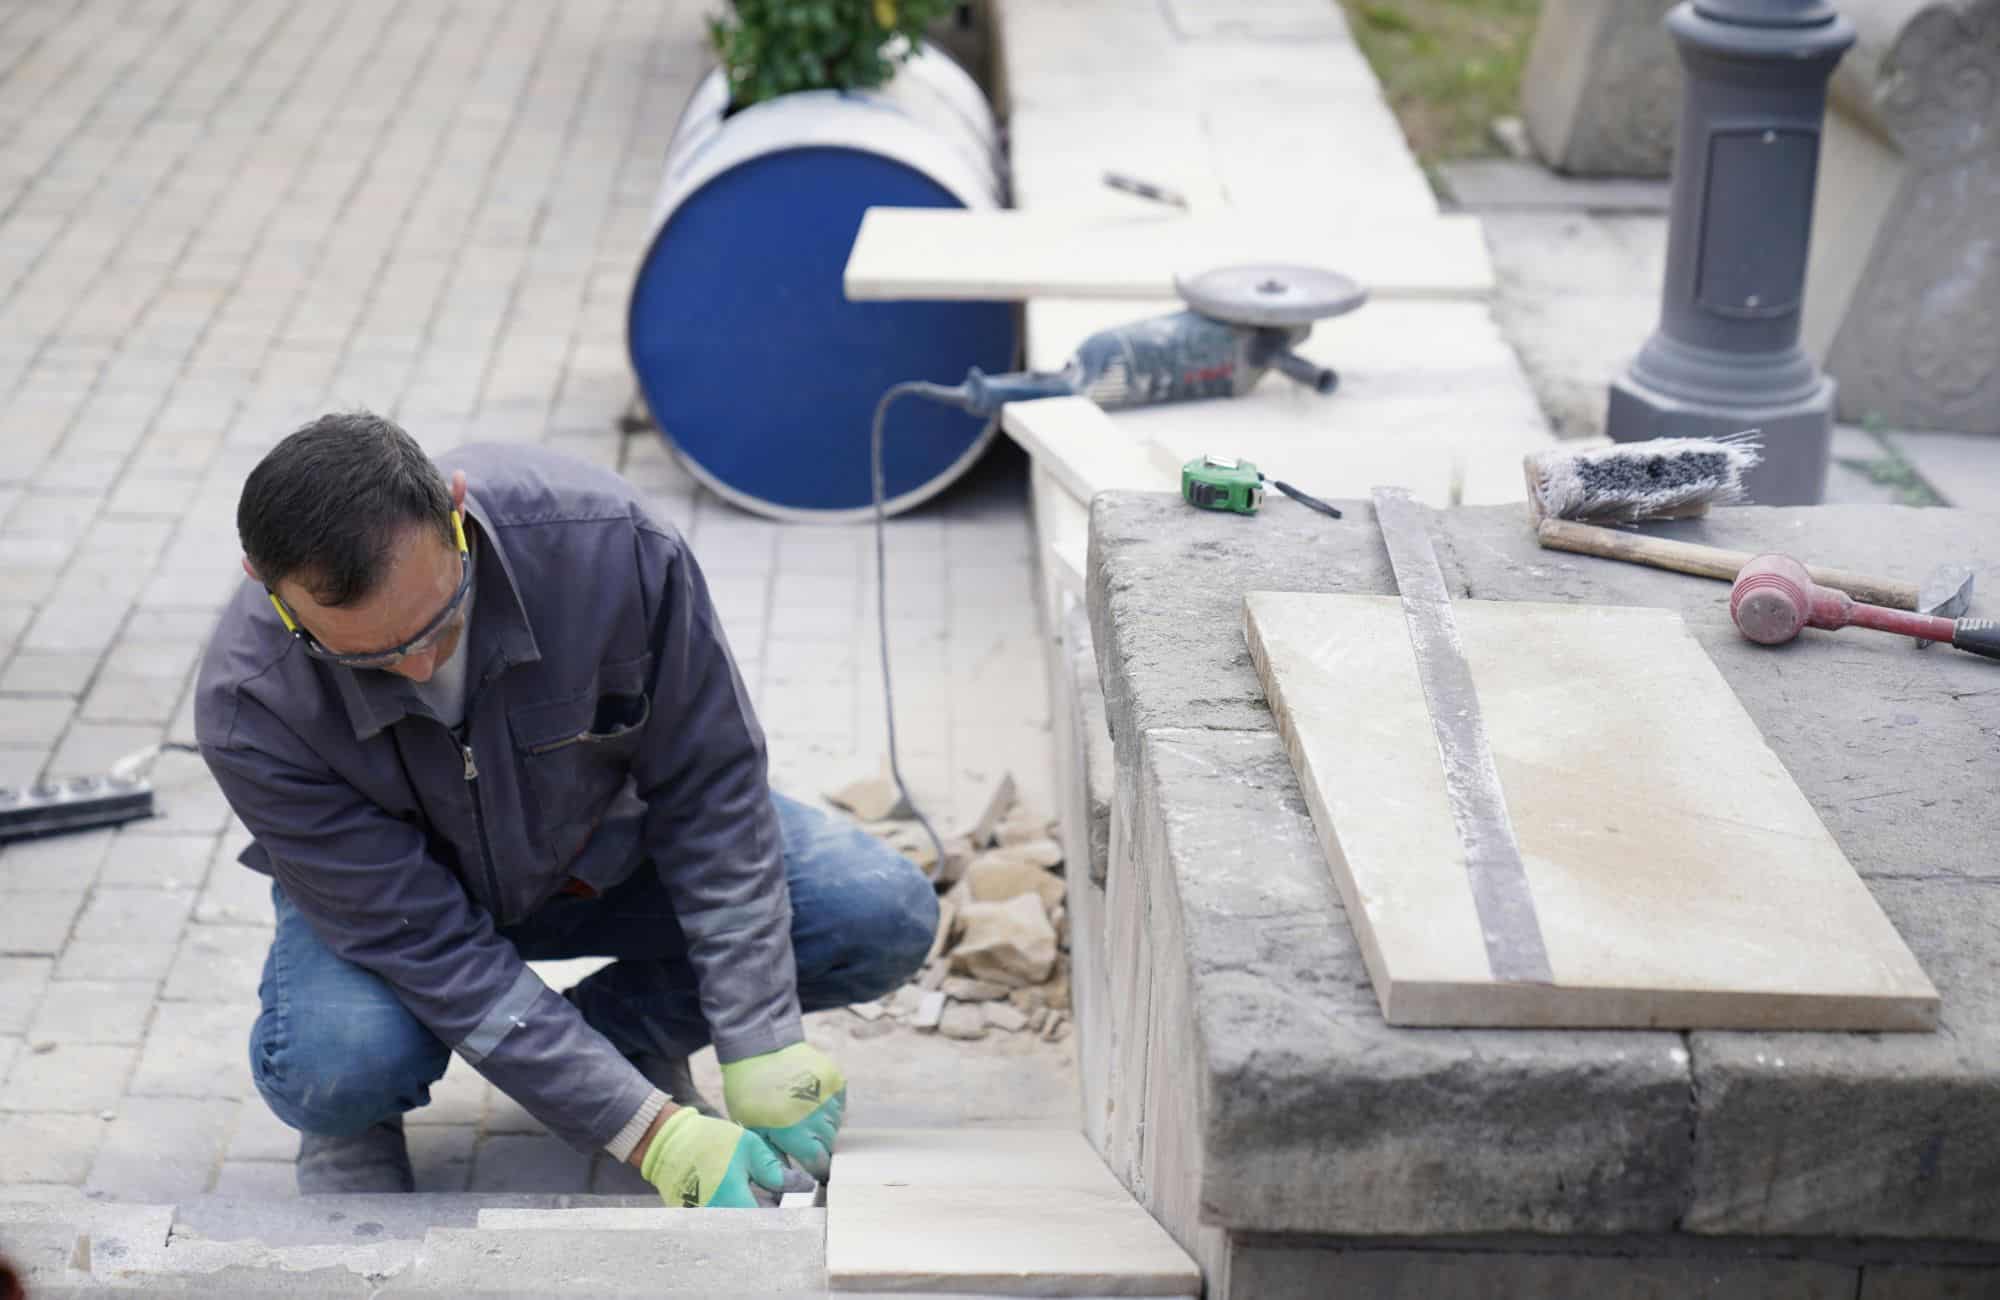
Tools and Materials Checklist for Semma Wall Installation
Preparation is where most successful installations are won or lost. Before excavation begins, materials and tools should be staged and verified. This reduces rushed decisions later that can compromise quality.
The following materials are typically required for a Techo-Bloc Semma wall installation:
- Semma wall blocks and matching cap units
- Crushed stone for the leveling base
- Clean drainage aggregate for backfill
- Perforated drain pipe
- Geotextile fabric
- Concrete adhesive for caps
In addition to materials, proper tools are essential for accuracy and efficiency:
- Plate compactor for base and backfill
- Four-foot level and string line
- Rubber mallet for alignment
- A masonry saw for cuts at corners and curves
Having everything ready before starting allows each installation step to proceed without shortcuts.
Step-by-Step Techo-Bloc Semma Wall Installation Process
This section walks through the complete installation workflow, from layout to finishing. Each step builds on the previous one, and skipping any of them increases the risk of future failure.
Step 1: Layout and Excavation
Installation begins with an accurate layout. The wall alignment should be marked clearly using stakes and string lines. Curves and corners must be defined before excavation to avoid reshaping later.
Excavation depth must account for base material and block embedment. A portion of the first course should always be buried below the finished grade. This embedment helps resist movement and anchors the wall into the soil.
Step 2: Base Preparation and Leveling Pad
A stable base is the foundation of a durable wall. The base area should be excavated wider than the wall itself to allow proper compaction and drainage.
Crushed stone is installed in lifts and compacted thoroughly. The final leveling pad must be flat and level from front to back and end to end. Any imperfections at this stage will multiply as courses are stacked.
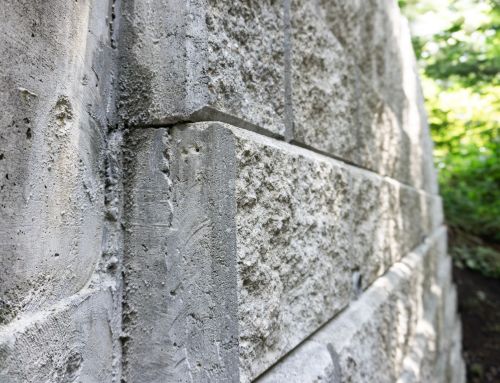
Step 3: Installing the First Course
The first course is the most important course of the wall. Semma blocks should be placed carefully, checked for level, and aligned precisely.
Each block must sit firmly on the base with no rocking. Adjustments should be made using base material rather than forcing blocks into position. Time spent here prevents visible alignment issues later.
Step 4: Drainage and Backfill Installation
Drainage is critical for any retaining wall system. A perforated drain pipe is installed behind the first course and surrounded by clean drainage stone.
Backfill is placed in lifts and compacted carefully. Geotextile fabric is used to separate native soil from drainage aggregate, preventing fines from clogging the drainage zone over time.
Step 5: Installing Additional Courses
Additional courses are stacked with joints staggered for strength and visual consistency. Each course should be checked for level and alignment before proceeding.
Backfill and compaction continue as the wall rises. For reinforced walls, this step includes placing geogrid at specified elevations.
Step 6: Reinforced Wall (Geogrid) Installation
Geogrid layers are installed horizontally between courses and extended into the backfill. Proper overlap and alignment are essential to ensure load transfer.
Geogrid must be laid flat and tensioned before backfilling. Wrinkles or gaps reduce effectiveness and can compromise wall performance.
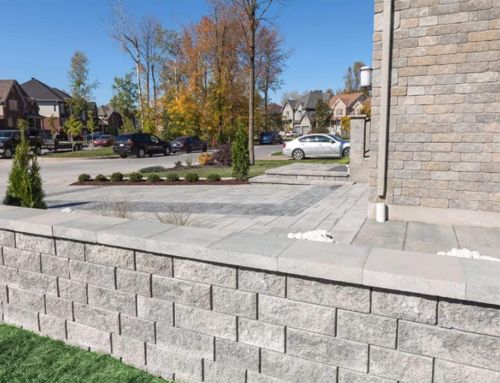
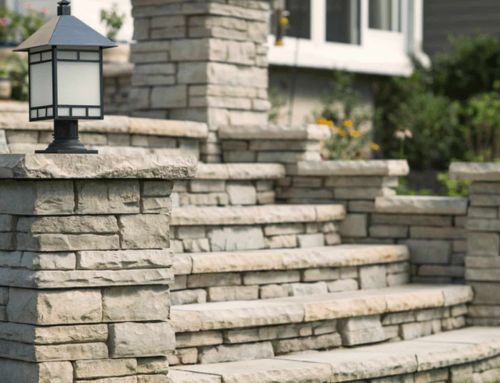
Step 7: Cap Installation and Finishing
Cap units provide a finished appearance and protect the wall from water intrusion. Caps are dry-fit first to confirm alignment and spacing.
Once positioned, caps are secured using concrete adhesive designed for masonry applications. Adhesive should be applied evenly to prevent shifting while curing.
Building Corners, Curves, and Special Layouts
Semma walls adapt well to complex layouts, but these features require additional planning and precision.
External and Internal Corners
Corners often require cutting blocks or using specific corner units. Each course should maintain consistent joint alignment to avoid visible irregularities.
Cut edges should face inward or be concealed whenever possible to maintain a clean exterior appearance.
Curved Semma Walls and Radius Limits
Curved walls require attention to minimum radius limitations. Blocks may need slight spacing adjustments, and joint staggering becomes more important to maintain strength.
Smooth curves are achieved by consistent layout and frequent alignment checks as the wall progresses.
Integrating Fences or Guardrails
When fencing or guardrails are installed behind a Semma wall, sleeves or posts must be accounted for during construction. Reinforced walls often require modified geogrid placement around these penetrations.
Planning these elements early helps prevent conflicts during construction. It also avoids the need to cut into finished work later.
Common Semma Wall Installation Mistakes and How to Avoid Them
Many installation failures stem from avoidable mistakes rather than product limitations. One of the most common issues is inadequate base compaction, which leads to settling and uneven courses.
Poor drainage is another frequent cause of failure. Without a functioning drainage system, hydrostatic pressure builds behind the wall, pushing it outward. Skipping reinforcement when required is equally problematic, especially for taller walls. Avoiding these mistakes requires patience, attention to detail, and adherence to installation guidelines rather than shortcuts.
Do You Need Engineering or Permits for a Semma Wall?
Local regulations often determine whether permits or engineering are required. Many municipalities mandate permits for retaining walls above certain heights or near property lines.
Engineering is typically required for reinforced walls or walls supporting slopes and structures. Consulting local building authorities early prevents delays and costly revisions later.
Conclusion
A successful techo bloc semma wall installation is built on planning, precision, and respect for structural principles. While the system itself is flexible and durable, long-term performance depends on proper base preparation, drainage, and reinforcement where required.
At Old Station Outdoor & Landscape Supply, working with experienced local professionals helps ensure the right materials and practical guidance are in place from start to finish. If you are planning a Semma wall project and want support in selecting materials or preparing correctly, contact us to discuss your project before installation begins. When installed correctly, a Semma wall delivers long-term structural reliability and clean architectural appeal.
FAQs
What is a Semma wall spec?
A Semma wall spec outlines the block dimensions, wall batter, base requirements, drainage details, and reinforcement guidelines. It also defines when a wall can be built as a gravity wall or must be reinforced with geogrid. These specs ensure structural stability and long-term performance.
Is Techo-Bloc of good quality?
Yes, Techo-Bloc is widely recognized for producing high-quality, durable hardscape products. Their blocks are manufactured with strict quality control and designed to perform in demanding outdoor conditions. Techo-Bloc products are commonly used in both residential and commercial projects.
How to properly lay retaining wall blocks?
Retaining wall blocks must be laid on a compacted, level base with proper embedment of the first course. Drainage stone and a perforated drain pipe should be installed behind the wall to relieve pressure. Blocks should be stacked level, staggered, and reinforced with geogrid when required.
How long does Techo-Bloc last?
Techo-Bloc products are designed to last for decades when installed correctly. With proper base preparation, drainage, and reinforcement, walls can perform reliably for 50 years or more. Longevity depends more on installation quality than on the material itself.