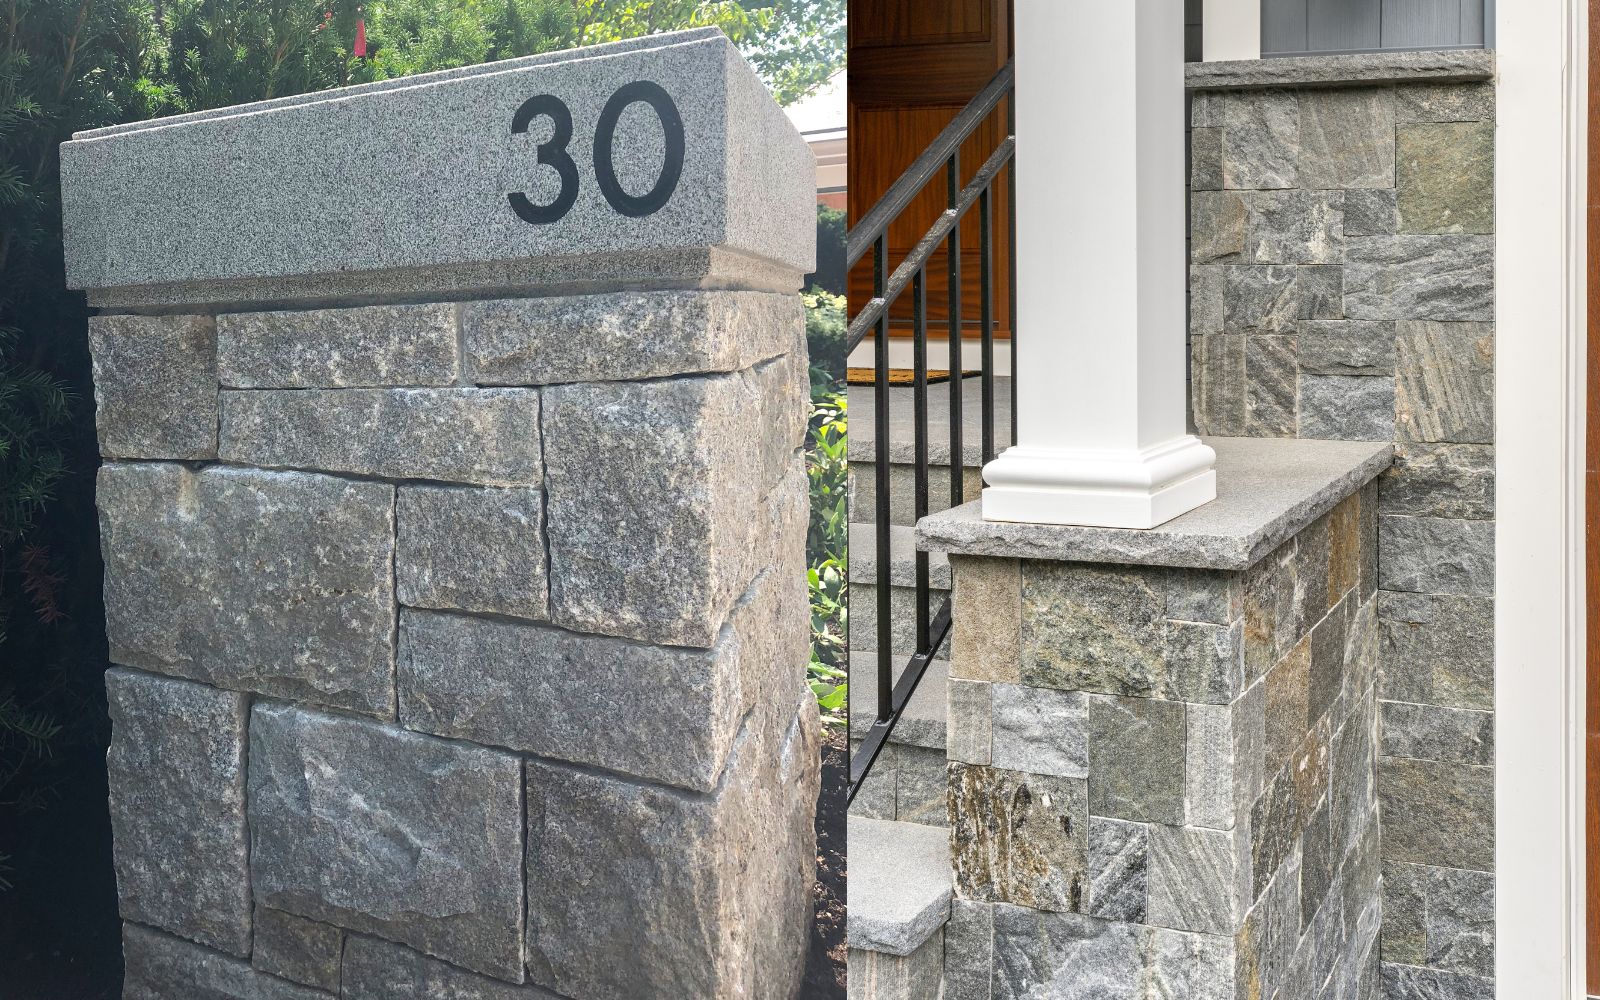
Stone pillars can be a stunning addition to your outdoor space. They serve as functional structures while adding an elegant touch to your landscaping. Whether you’re building a pillar as part of a gate post, garden feature, or just as a standalone architectural accent that can stand independently as a decorative or supporting element, knowing how to construct a stone pillar properly is essential for ensuring both its durability and aesthetic appeal. Stone columns are also a popular choice for enhancing entrances and driveways.
In this guide, we will walk you through the process of building a stone pillar, from selecting the right materials to laying the foundation and completing your column with a capstone. The cap is the finishing element that provides a polished look and stability to your stone pillar. If you’re looking to create a lasting, visually pleasing stone pillar that complements your landscape design, this article will give you everything you need to know.
What is a Stone Pillar?
A stone pillar, sometimes referred to as a stone column, is a vertical structure constructed from durable materials such as stone, wall blocks, or masonry blocks. These pillars are designed to provide both structural support and visual interest in a variety of outdoor projects. Whether used as a standalone feature or as part of a larger construction, like a retaining wall, fence, or entranceway, stone pillars can define spaces, mark boundaries, or simply enhance the style of your landscape. You can outline the column’s placement with paint or a string line to ensure proper alignment within your project.
The construction of a stone pillar involves careful planning, precise excavation, and the use of high-quality materials to ensure a stable foundation and a long-lasting structure. Pillars can be built to different heights, with driveway columns typically standing between 3 and 4 feet tall, but the final dimensions can be customized to suit your intended design and the surrounding architecture. When planning the size and number of stone pillars, consider the overall scope of your project to estimate material needs and achieve your desired outcome. The style of your stone pillar can vary from rustic to modern, depending on the materials used. Thoughtfully incorporating stone pillars will enhance your outdoor space and ensure lasting appeal.
Why Choose Stone for Your Pillar?
Stone is a popular material for pillars because of its durability and aesthetic value. Natural stone provides a timeless look that enhances the beauty of any garden or outdoor area. Some benefits of choosing stone for your pillar include durability, as stone is highly durable and can withstand harsh weather conditions such as rain, snow, and wind. This makes it an ideal material for outdoor features that need to endure the elements.
In addition to durability, stone offers significant aesthetic appeal. It adds a rustic, natural element to your outdoor space. Whether you’re using sandstone, granite, or limestone, stone pillars fit well in both modern and traditional designs. Furthermore, stone is a sustainable material that can last for decades with minimal maintenance. When you opt for stone, you’re investing in a material that not only offers beauty but also strength and longevity.
Materials Needed to Build a Stone Pillar
Before building your stone pillar, gather essential materials like stone blocks (granite, slate, or stone veneer), gravel for a stable foundation, mortar or waterproof adhesive to secure the stones, and a capstone for a neat finish and protection. When preparing the foundation, make sure the base is flat to provide a smooth, level surface for construction. These materials ensure the durability and functionality of your pillar, especially when exposed to the elements. Be sure to calculate the amount of stone and other materials needed based on the dimensions of your pillar.
For construction, you’ll need tools like a measuring tape for accuracy, a level for alignment, a rubber mallet for stone placement, a shovel for excavation, a trowel for applying mortar, and a carpenter’s square to ensure right angles. With the right materials and tools, you’ll be able to build a strong, aesthetically pleasing stone pillar.
Safety Tips and Precautions
Safety should always be a top priority when constructing a stone pillar or column. Before you begin any excavation, it’s essential to call 811 to have underground utilities marked. This step helps prevent accidental damage to electric, gas, or water lines, which could lead to serious injury or costly repairs. When handling heavy stone, block, or other construction materials, always wear protective gear such as gloves, safety glasses, and a dust mask to shield yourself from dust, debris, and sharp edges.
Follow the manufacturer’s instructions for any adhesive or construction products you use to ensure a secure bond and proper application. Take care when lifting and positioning large stones or blocks to avoid strain or injury, and consider using mechanical aids or asking for help with especially heavy materials. Construct your stone pillar on a solid, level foundation, such as a cement base, to provide stability and prevent shifting or collapse over time. By adhering to these safety tips and precautions, you’ll not only create a beautiful and durable stone pillar but also protect yourself and others throughout the construction process.
Cutting and Shaping Stone
Cutting and shaping stone is vital for creating a professional and durable stone pillar. Use a 4″ diamond blade grinder for clean, precise cuts and follow manufacturer guidelines, especially with products like Airstone. Plan cuts carefully to maintain structural integrity, using specialized cornerstones for a seamless look and marking flat stones for uniformity. Apply construction adhesive to ensure a strong, lasting bond.
Safety is paramount, so wear protective gear and work in a well-ventilated area. By following these steps, you’ll create a sturdy and attractive stone column that reflects the same careful planning and adherence to best practices found in the OECD’s inclusive framework and pillar one proposals. Just as the two-pillar approach guides companies navigating complex tax rules, your attention to detail in cutting and shaping will ensure your stone pillar project is both compliant with construction standards and built to last.
How to Build a Single Stone Pillar (1 Pillar)
If you’re looking to build just one stone pillar, whether as a standalone feature or part of a larger hardscaping project, the process remains the same as building multiple pillars but requires careful attention to detail, especially if you’re focusing on aesthetics and durability for a single, prominent pillar. A decorative garden column can rest on a paver base and does not always need to support heavy loads. In some cases, pillar blocks can sit directly on a patio surface for a simpler installation. The following steps will walk you through an example scenario to illustrate the process.
Step 1: Choose the Location
Start by selecting the ideal location for your pillar. Use paint or a string line to outline the exact placement of your pillar to ensure accurate positioning. This will depend on the design of your landscape and the purpose of the pillar. Whether it’s for a garden accent, a driveway column, or as part of a gatepost, ensure the pillar’s location enhances the surrounding environment.
Step 2: Gather Materials and Tools
For a single pillar, you’ll need materials like stone blocks (granite, slate, or veneer), gravel, mortar or adhesive, and a capstone. Essential tools include a measuring tape, level, rubber mallet, shovel, trowel, and carpenter’s square. Before starting, calculate the required materials based on the pillar’s dimensions.
Step 3: Plan and Build the Foundation
For one pillar, it’s even more critical to ensure that the foundation is level and stable. Excavating the area to a depth of 6–8 inches for gravel ensures that the pillar will remain stable over time. Make sure the gravel surface is level to support the pillar securely. Create a flat base before you lay the first layer of blocks to ensure stability and a smooth, professional finish.
Step 4: Stack the Stone Layers
Once your foundation is ready, start stacking the stone blocks, ensuring that each layer is level. Use mortar or adhesive between each stone for strength and durability. For added strength and aesthetic appeal, ensure that the seams between the stones are offset from the one below.
Step 5: Install the Capstone
For a single stone pillar, the capstone will be the finishing touch that not only enhances the pillar’s look but also prevents water damage. Choose a capstone that is slightly larger than the pillar’s top layer to allow for proper drainage. Apply mortar or adhesive to secure it in place, ensuring it’s level and properly aligned.
Design Tips for Your Stone Pillar
Stone pillars come in many shapes and styles, so it’s important to choose a design that complements your space. When planning your stone pillar, consider the natural vs. chiseled edges. Chiseled edges give a more refined, contemporary look, while natural edges provide a rustic, rough texture. Next, determine the appropriate height and size for your pillar based on its purpose, such as a gatepost or decorative feature, and ensure the proportions suit the surrounding landscape. Additionally, think about color coordination by choosing a stone color that complements the existing design of your garden or home exterior. These design choices will help integrate the stone pillar seamlessly into your outdoor space.
Common Mistakes to Avoid When Building a Stone Pillar
Uneven foundation is a common issue that can occur if you fail to properly level the base, leading to a crooked pillar over time. Additionally, overuse of adhesive can cause spillage and mess, which ultimately reduces the aesthetic value of your pillar. Furthermore, incorrect measurements can cause problems, so it’s essential to always double-check measurements before cutting stones or stacking layers to avoid mismatched stones. By addressing these common mistakes, you can ensure a sturdy, aesthetically pleasing stone pillar.
Conclusion
Building a stone pillar can elevate the beauty of your outdoor space, creating a lasting architectural feature. By following these steps and paying attention to detail, you can construct a pillar that adds both functionality and aesthetic value. Whether you’re designing a gatepost, garden accent, or entryway feature, a stone pillar offers timeless elegance and durability.
For more accurate cost estimates and expert guidance on building your stone pillar, it’s best to consult with a professional in your area. At Old Station Outdoor & Landscape Supply, we’re here to help you bring your stone pillar project to life. With top-quality materials and expert guidance, we make it easy to create a durable, beautiful feature for your outdoor space. Get in touch with us today, and let’s get started on transforming your landscape!
FAQs
How much does it cost to build a stone pillar?
The cost to build a stone pillar varies depending on the size, material, and labor, typically ranging from $300 to $1,500 or more.
How much cement is required for one pillar?
The amount of cement required for one pillar depends on its size, but typically, a 12-inch diameter pillar may require about 0.5 to 1 cubic yard of cement.
How is a pillar built?
A pillar is built by excavating the foundation, setting up formwork, pouring concrete, and reinforcing it with steel bars before allowing it to cure.
What kind of cement is used for pillars?
For pillars, Portland cement is commonly used as it provides strength and durability for structural support.


